

Custom Patch Size Guide: What Size Patch Do You Need?
Key takeaways
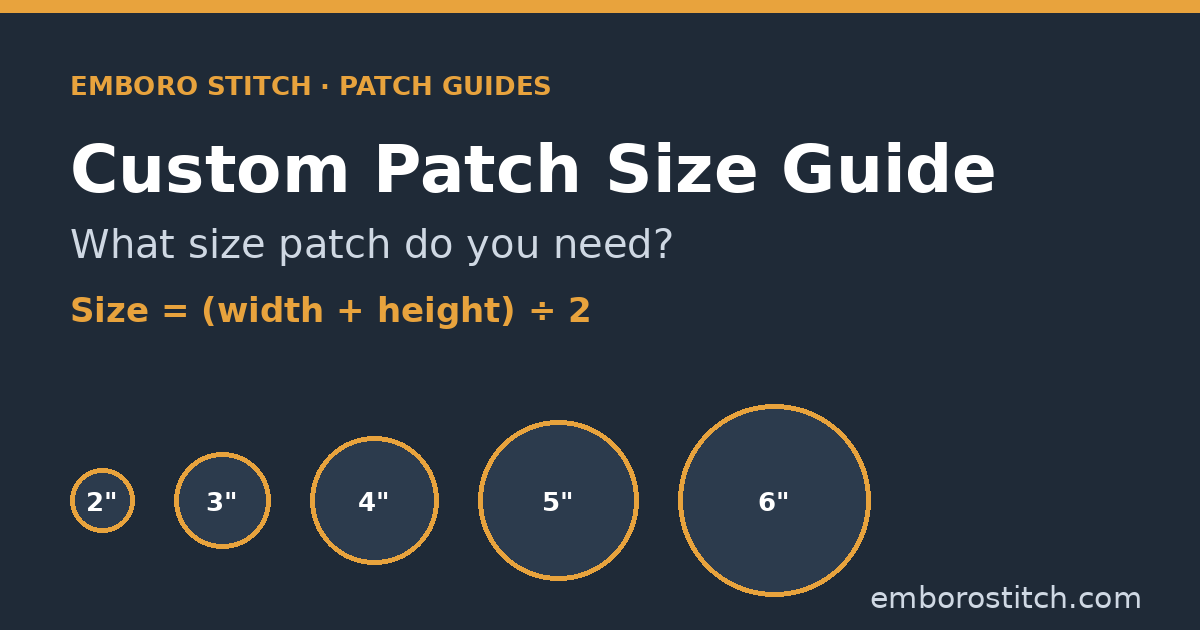
- Patch size is measured as (width + height) ÷ 2. A 2″ x 4″ patch counts as a 3″ patch.
- Most hat fronts take a patch around 2″ to 3″ tall; jacket and vest backs can take 6″ or more.
- Name patches and chest patches usually sit in the 3″ to 4″ range.
- Small text needs room. If your design has fine lettering, go bigger or choose a woven patch.
- Size changes the price per piece, so check the size before you request a quote with our patch price calculator.
Quick answer: For most orders, pick 2″ to 3″ for hats, 3″ to 4″ for chest, sleeve and name patches, and 5″ to 6″ or larger for jacket and vest backs. Measure the spot on the garment first, then size the patch so it fits with a little space around it. Patch size for pricing is the width plus the height divided by 2.
How much will your patches cost? Pick size, quantity and backing for an instant estimate.
Estimate your priceHow patch size is measured
Patch makers do not size patches by width alone. The common method is to add the width and the height, then divide by 2. That number is the “patch size” used on price tables and quotes.
A few examples:
- 3″ wide x 3″ tall = (3 + 3) ÷ 2 = 3″ patch
- 4″ wide x 2″ tall = (4 + 2) ÷ 2 = 3″ patch
- 5″ wide x 3″ tall = (5 + 3) ÷ 2 = 4″ patch
- 3.5″ wide x 1″ tall name tape = (3.5 + 1) ÷ 2 = 2.25″ patch, which rounds up to the 3″ row
If your size falls between two rows, it is priced at the next size up. On our custom patches pricing page, the tables cover 2″ to 6″. Anything over 6″ is on custom quote.
All sizes in this guide are in inches. If your design file is in millimeters or centimeters, one inch is exactly 25.4 mm, as defined by the National Institute of Standards and Technology (NIST).
Custom patch size chart by placement
These are the ranges we see work well on real garments. They are starting points, not hard rules. Always check against your own item.
| Placement | Typical patch size | Shape that fits best | Notes |
|---|---|---|---|
| Baseball cap front | 2″ to 3″ tall, up to about 3.5″ wide | Rectangle, oval, shield | Height is the limit on curved crowns |
| Trucker or flat-bill hat front | 2.5″ to 3″ tall, up to about 4″ wide | Rectangle, badge | Taller front panel gives more room |
| Beanie cuff | 1.5″ to 2″ tall, 2″ to 3″ wide | Rectangle, rounded rectangle | Keep it shorter than the folded cuff |
| Left chest | 3″ to 4″ | Circle, shield, logo shape | Fits polos, work shirts and jackets |
| Name patch | 3.5″ x 2″ to 4″ x 2.5″ | Rectangle, oval | Larger if you add a title or logo |
| Sleeve / shoulder | 3″ to 4″ | Shield, circle, flag | Wider than 4″ can wrap around the arm |
| Jacket or vest front panel | 3″ to 5″ | Any | Watch zippers, snaps and pockets |
| Jacket or vest back | 6″ to 12″ | Large circle, rocker set, shield | Over 6″ is quoted separately |
| Backpack or bag | 3″ to 5″ | Any | Measure the flat front pocket area |
| Tactical gear loop panel | Match the loop panel, often about 2″ x 3″ or 3″ x 5″ | Rectangle | Hook backing must sit inside the panel |
Choosing a size for each placement
Hats
On a hat, the height of the front panel is the main limit. A typical structured cap has a curved crown, so a patch that is too tall will bend or lift at the top edge. Most hat patches land between 2″ and 3″ tall, with the width set by your logo. A wide, short rectangle usually looks cleaner than a tall square on a cap.
Leather and PVC patches are common on hats because they hold a crisp edge on a curved surface. For more detail on hat styles and patch types, read our post on custom patches for hats, or see our custom hat patches page.
Chest and name patches
A left-chest patch should look balanced next to the placket or zipper. On most adult shirts and jackets, 3″ to 4″ works. Go toward 3″ for polos and slim fits, and 4″ for heavier jackets and coveralls.
Name patches are usually rectangles or ovals around 3.5″ x 2″. That is enough for a first name in clear block letters. If you want a name plus a title, or a name plus a logo, move up to about 4″ x 2.5″ so the letters do not get cramped. See our custom name patches page for options.
Sleeves and shoulders
Shoulder patches sit on a curved surface that moves with the arm. Around 3″ to 4″ is the usual range. Larger patches can wrap around the sleeve and pucker, especially on thin fabric. Shields and circles fit this spot well because they follow the shape of the shoulder.
Jacket and vest backs
The back is the one place where big patches work. Club vests, team jackets and varsity jackets often use a back patch of 6″ to 12″, sometimes with curved “rocker” patches above and below. Measure across the shoulder blades, from seam to seam, and leave at least an inch of space on each side.
For the front of a jacket, stay around 3″ to 5″ so the patch does not run into pockets, snaps or the zipper. Our custom jacket patches page covers backings and patch types for denim, leather and nylon jackets.
Bags and tactical gear
For backpacks and bags, measure the flat area you want to cover. Seams and zippers make a surface uneven, so plan the patch to sit inside them. For tactical gear with loop panels, size the patch to match the panel. The hook backing should sit fully on the loop side, with no hook edge hanging over.
How detail and patch type affect size
The more detail you have, the more size you need. Thread has a real width, so very small letters and thin lines can fill in or blur. As a working rule, keep text on an embroidered patch at about a quarter inch tall or more, and avoid hairline strokes.
If you need small text or fine detail at a small size, look at other patch types:
- Embroidered patches give a raised, textured look. They are the classic choice, best for bold logos and clear text.
- Woven patches use thinner thread woven tightly, so fine lettering stays sharp at smaller sizes.
- PVC patches are molded, so they keep crisp, raised edges on small parts and work well outdoors.
- Chenille patches are fuzzy and bold. They need more size, so they suit jacket backs and letters, not tiny logos.
Not sure which type fits your design? Our custom patches page compares all of them. Background on how patches are made is also on Wikipedia’s embroidered patch article.
How size affects price
Size and quantity are the two biggest drivers of price per piece. A bigger patch uses more thread or material and more machine time. A bigger order spreads setup across more pieces, so the price per piece drops.
Here is how size changes the price of an embroidered patch at 100 pieces, using live figures from our pricing page:
| Embroidered patch size | 50 pieces | 100 pieces | 500 pieces |
|---|---|---|---|
| 2″ | $3.15 | $2.26 | $0.87 |
| 3″ | $3.80 | $2.55 | $1.15 |
| 4″ | $4.95 | $3.25 | $1.54 |
| 5″ | $7.15 | $4.50 | $2.15 |
| 6″ | $9.60 | $6.60 | $3.12 |
Prices are per piece in US dollars and include artwork setup. They do not include shipping, add-ons or rush. Orders start at just 10 pieces.
Two practical takeaways. First, a small change in size can move you into a different row, so it is worth checking your (width + height) ÷ 2 number. Second, going from 5″ to 4″ on a chest patch often looks just as good and costs less. Try a few sizes in the patch price calculator to see the difference for your patch type and quantity.
How to measure before you order
- Measure the spot, not the garment. Use a soft tape measure on the actual item, in the exact place the patch will go.
- Leave a margin. Keep space from seams, zippers, pockets and buttons so the patch lies flat.
- Make a paper test. Cut a piece of paper to your planned size and tape it on. This is the quickest way to judge how it looks.
- Check your smallest text. If it looks tiny on the paper, go up a size or choose woven.
- Do the math. Add width and height, divide by 2, and note the size row.
- Ask for a mockup. Every patch order includes a Free Digital Mockup Before Production that shows size, colors, backing and border, with minor revisions included.
Once you approve the mockup, standard production is 7 to 14 business days. If you have an event date, rush custom patches are made in 3 to 5 business days for a fee. Shipping is charged separately, and we ship to all 50 states.
Not sure about the size? Send us your design and where it will go. We will suggest a size and show it in your free digital mockup.
Get a free digital mockupFAQ
What is the most common custom patch size?
3″ is the most common size. It works on chests, sleeves, bags and many hats, and it leaves enough room for a clear logo.
How do you measure a patch size?
Add the width and the height, then divide by 2. A 4″ x 2″ patch is a 3″ patch. If the result falls between sizes, it is priced at the next size up.
What size patch goes on a hat?
Most hat patches are 2″ to 3″ tall and up to about 3.5″ to 4″ wide, depending on the crown height. Wide, short shapes usually sit best on a curved front.
What size should a back patch be?
Back patches on jackets and vests are usually 6″ to 12″. Measure across the back between the shoulder seams and leave about an inch on each side. Patches over 6″ are on custom quote.
Can I order a custom shape instead of a circle or square?
Yes. Patches can be cut to the shape of your design. Size is still measured as (width + height) ÷ 2 using the outer edges.
Does a bigger patch cost more?
Yes. Price per piece goes up with size and goes down with quantity. For example, a 3″ embroidered patch is $2.55 each at 100 pieces, and a 4″ is $3.25 each.
Need Custom Patches?
Send us your design and get honest pricing back within 24 hours, plus a free digital mockup before production. No obligation.
Get a Quote